WebDAV on a Windows Server 2016
WebDAV is a protocol mainly used by Windows to share folders over the Internet. The folder shared on the server can be mounted on clients as a network drive. So it is possible to use remoter resources without additional programs or similar. In contrast to FTP, files can be opened, edited and processed directly from the WebDAV directory. It is similar to a folder shared with SAMBA in the local network.
This article shows you step-by-step how to share a folder using WebDAV and then connect it from a Windows client.
Prepare Server
A fully installed and configured IIS is a prerequisite for the use of WebDAV. The installation of IIS 10 on Windows Server 2016 is shown in this article.
If IIS is installed and ready for use, you can start the installation of WebDAV.
Install WebDAV
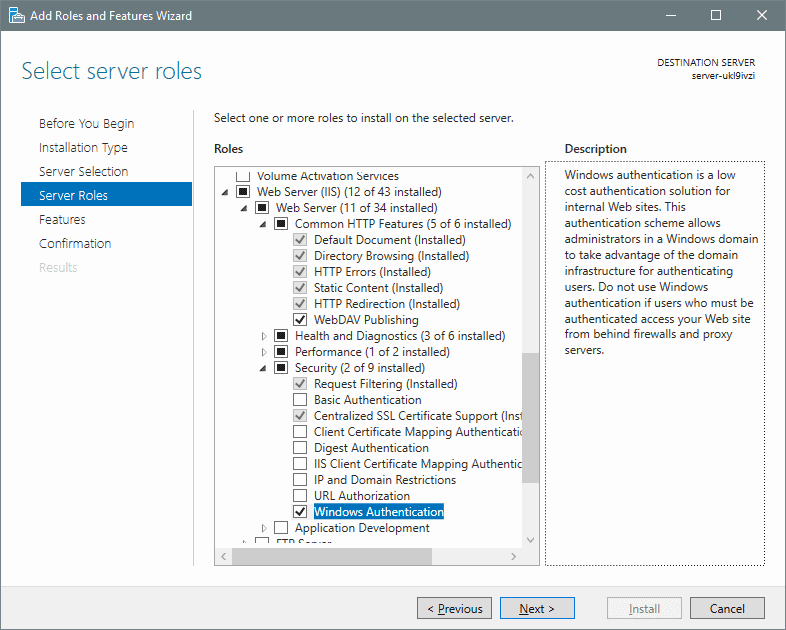
Similar to IIS, WebDAV is installed using Server Manager. Open the Server Manager (as explained in the IIS article) to select “Add Roles and Features”. Afterwards, the wizard can be clicked until “Server Roles” appears. There, under Web Server (IIS), select “Web Server” and then click on WebDAV Publishing.

Windows Authentication is also required. This can be found under Web Server IIS -> Web Server -> Security -> Windows Authentication.
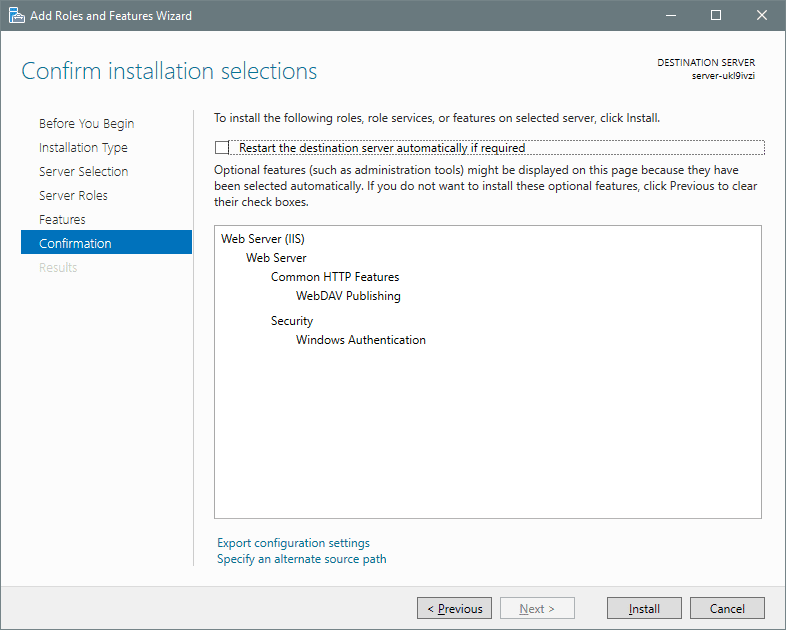
Then click Next. The point features are skipped.
Then the summary is shown again. Click on Install.
When the installation is complete, WebDAV is installed. However, to use WebDAV, some settings are still required.
Set up WebDAV
Next, open the IIS Manager to create a Virtual Directory. To do this, navigate to Default Web Site (or your site) in the left menu, and then click View Virtual Directory on the left side of the menu. By clicking on Add Virtual Directory (also in the left menu) you can now add a new directory. This will later be the directory to be shared via WebDav. The alias that is given here is later part of the URL. In this example, the corresponding address would be
Copyhttp://IPorDomain/WebDAV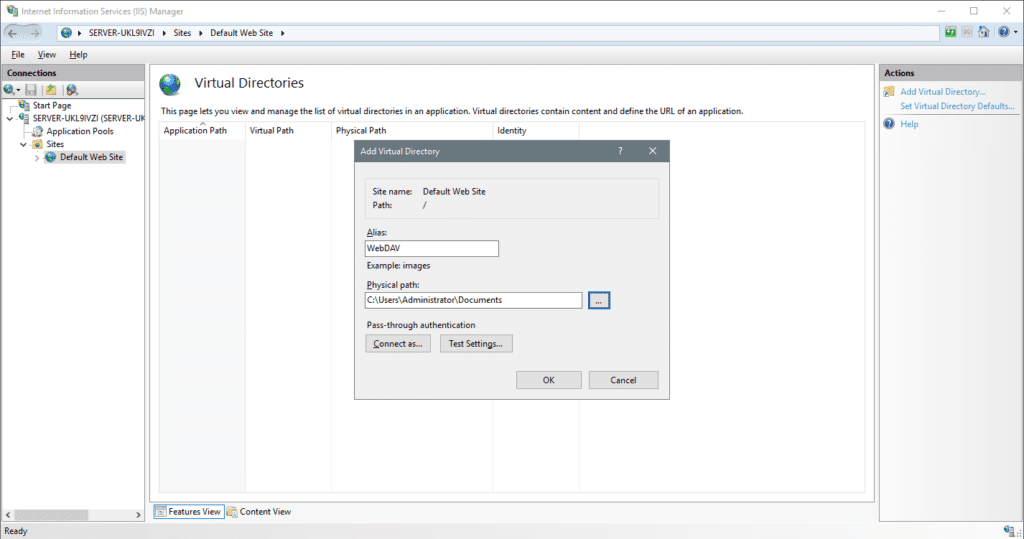
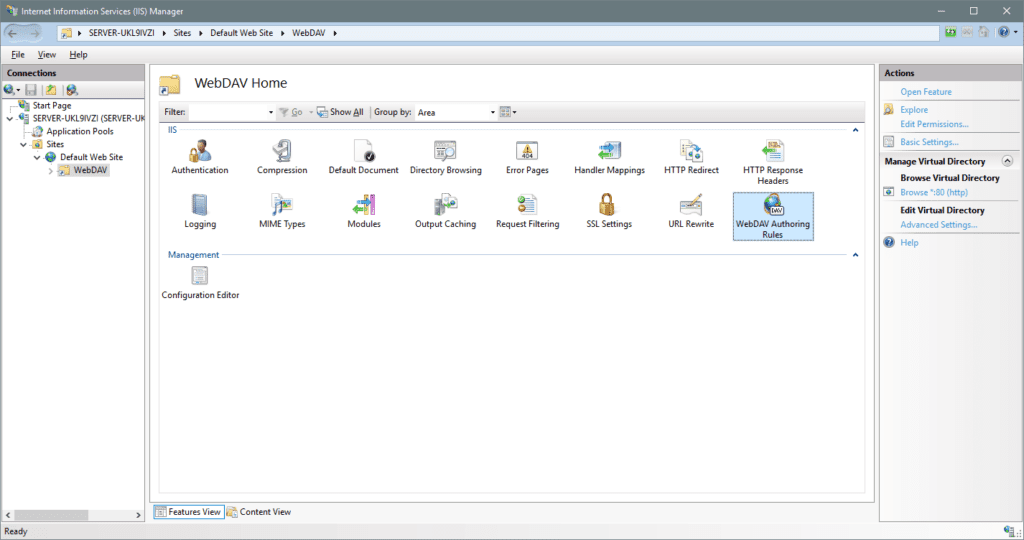
Then click on the directory you just created and select WebDAV Authoring Rules.
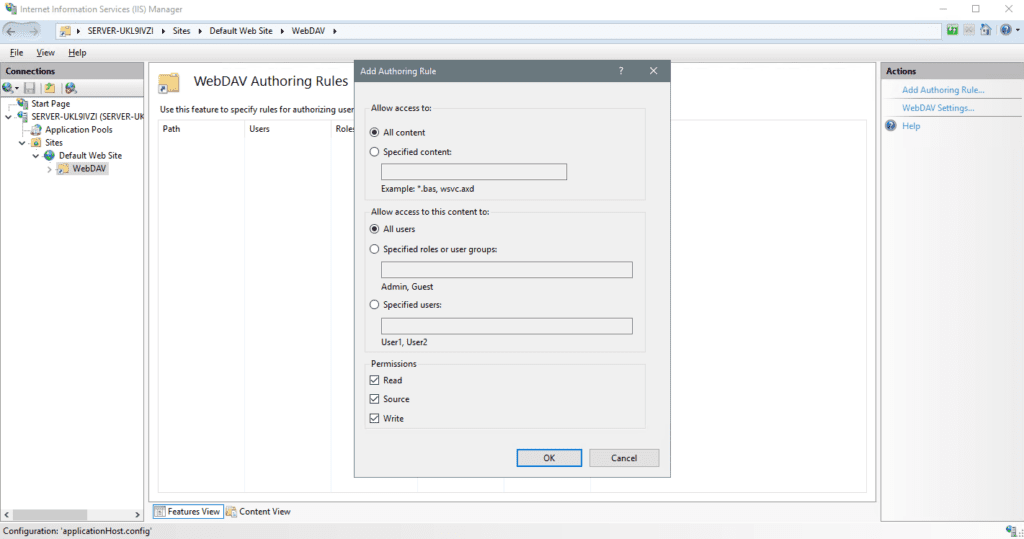
In the right-hand menu you can select Add Authoring Rule. Here you have to define the type of content that can be viewed by whom. For example, UserGroup “employees” can only see “.docx” files, or group “guest” can only see “.jpg and .png” files. The permissions are also important here. You specify whether the user can only view or use the file.
If the selection is made, you can confirm with OK.
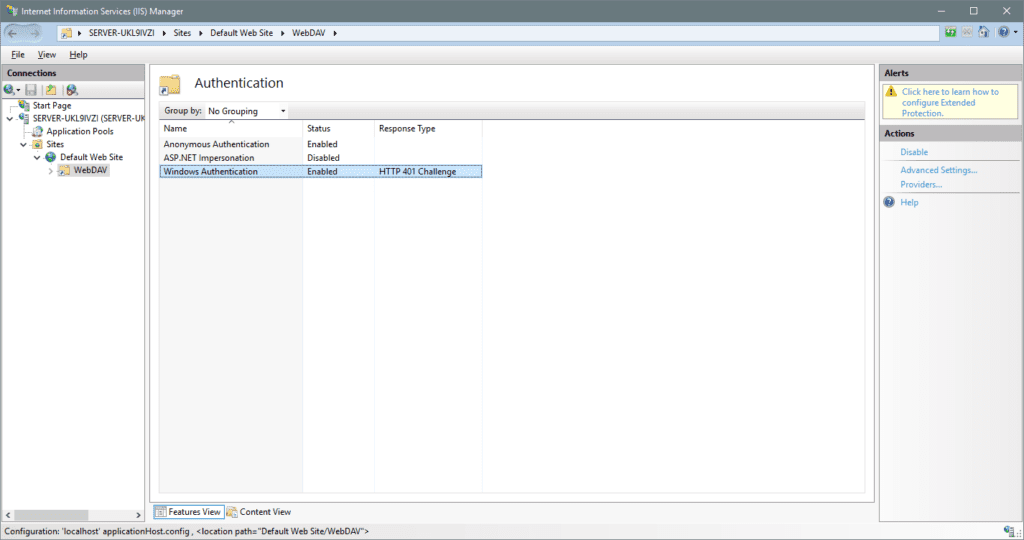
The authentication method must then be selected and activated. To do this, click on the directory on the left of the menu and then select Authentication.
Right-click “Windows Authentication”.
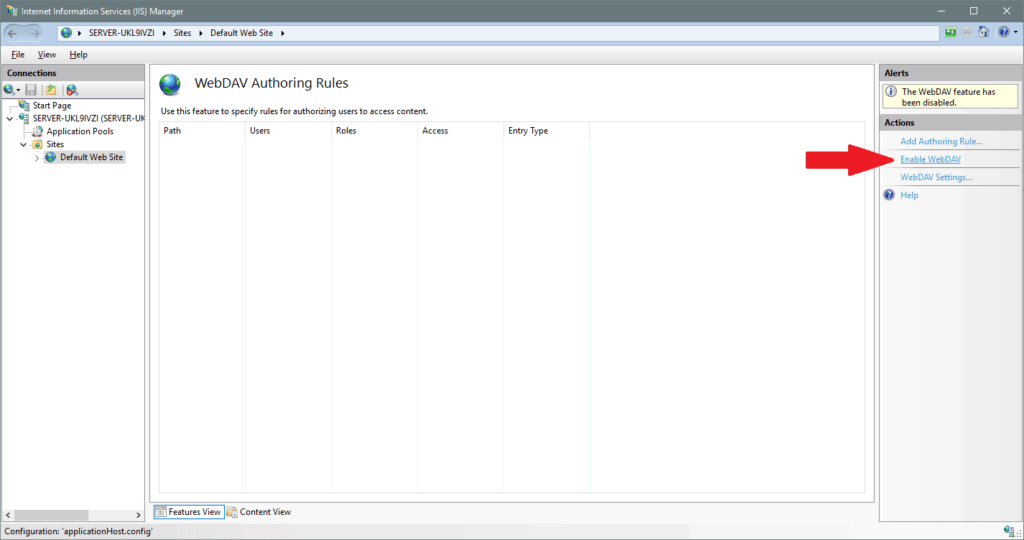
You can then click on the Default Web Site (or the site of your choice) on the left side of the menu to select WebDAV Authoring Rules. On the right, WebDAV must be activated by clicking Enable WebDAV.
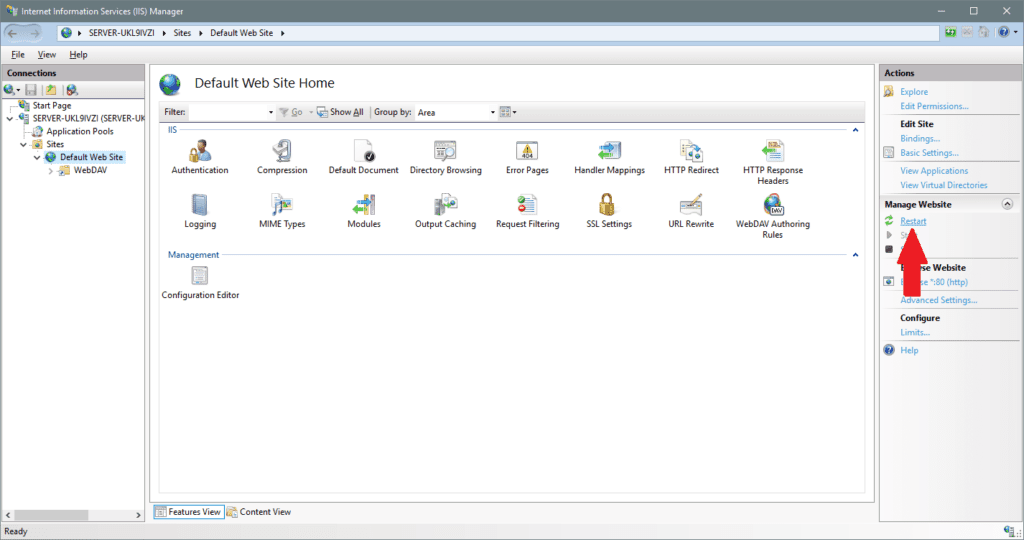
You must then click again on Default Web Site (or any other website) on the left side. The IIS service can then be restarted by clicking Restart.
WebDAV is now ready. Depending on the configuration, the port 80 / TCP may have to be released in the firewall.
Integrate WebDAV on client
To create the created folder now on the client, the Explorer must be opened. Click on Map network drive at the top.
Then the path to the corresponding folder must be entered. The following syntax applies:
Copyhttp://<IPorDomain>/<Filename>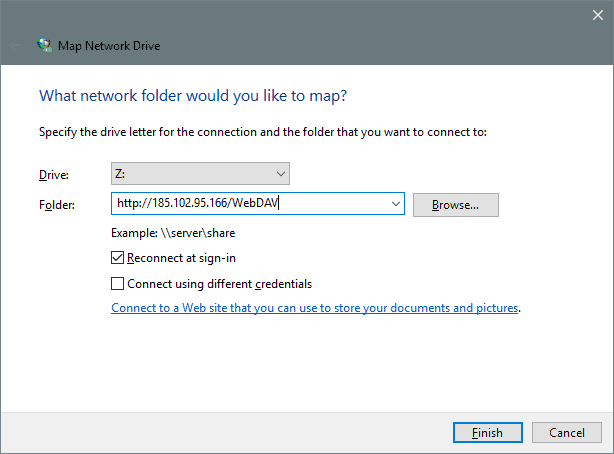
It is important that WebDAV is case-sensitive. The folder name must be entered exactly as it is stored in IIS.
If the client already has access data for the server but the WebDAV folder is used for other data, a checkmark must be made for “Connect using different credentials”. If no access data is stored at all, the next step is prompted to enter it.
The folder can now be reached under the selected drive letter (in the example “Z:”).
Summary
The setup of WebDAV directories is done quickly and offers the possibility to make folders accessible from outside. However, as always when it is possible to reach services from the Internet, there is a certain security risk. Therefore it is recommended to encrypt all services with an SSL certificate and use only encrypted protocols.