Set your hostname and Fully Qualified Domain Name
A hostname is the name of a computer/cloud server that is connected to a network. The hostname is used to identify the computer in the network. It is also part of the Fully Qualified Domain Name (FQDN), which is required for many applications. If you intend to set an FQDN during the installation of Plesk, for example, this article can help.
The prerequisite is that the server has a root user. In this tutorial you will see how the hostname of the server and the FQDN can be set. In this example, we will use the name “web1.gridscale.io”.
Step 1: Set the hostname
To check which hostname is currently set, enter the following command into the console:
hostnameThe output now shows:
test1In this case, this is the hostname, which was set during setup in the gridscale panel. This can now be changed to any other name – in this example, web1.
Open the “/etc/hostname” file with an editor of your choice:
sudo nano /etc/hostnamereplace your current hostname with a new hostname of your choice, we will replace ours with “web1”. Save your changes with “Ctrl + O”, after confirming the filename with “Enter”, close nano with “Ctrl + X”. The change will take effect after the next restart – should you want the changes to take place without restarting, the following command will achieve that:
sudo hostname web1Attention: Changing the hostname with the command “sudo hostname web1” is only temporary and will be overwritten when rebooted. To make the change permanent, it is necessary to edit the /etc/hostname file. This is not a replacement for the first step.
Check the command was successful by typing:
hostnameIf it returns the new hostname you entered, the hostname was successfully set.
Step 2: Set the Fully Qualified Domain Name (FQDN)
In order to set the FQDN, the public IP of the server is required, in addition to your own FQDN. In this case, 123.123.123.123 is selected as an example.
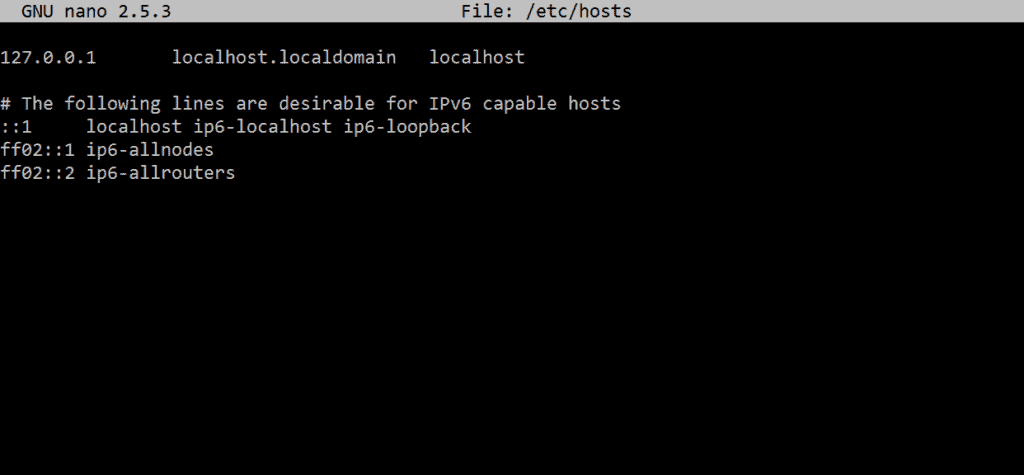
The FQDN is modified in the /etc/hosts file.
Open the file in any editor with root privileges:
sudo nano /etc/hostsThe file should look something like this:
Now the following lines will be set:
123.123.123.123 web1.gridscale.io web1When finished, it should look like this:
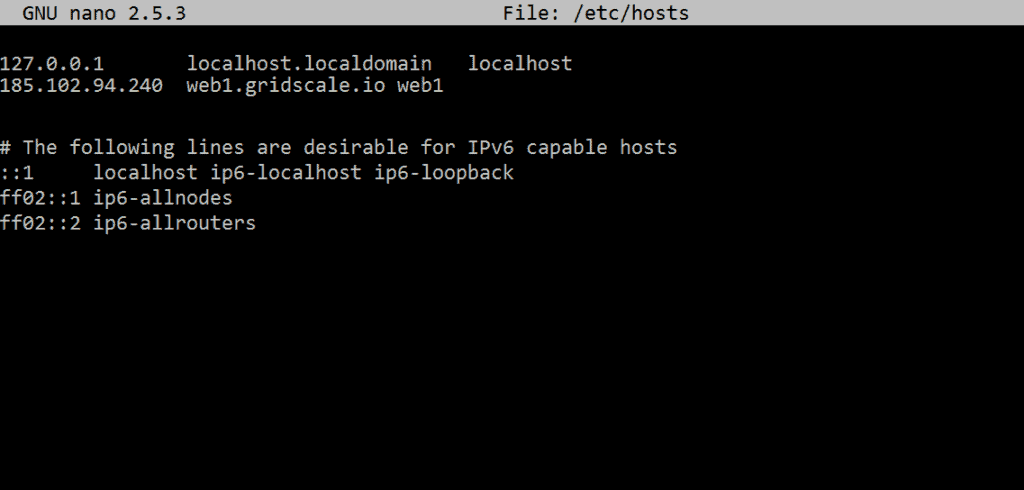
Be sure to save the changes before the FQDN is verified with this command:
hostname –fThe FQDN has now been set successfully and these changes are permanent.