How to SDN 1/2 (Virtual Switch)
Want to share a private network across multiple projects? In this tutorial, we will show you how to make this possible using SDN. We will connect two projects via a private network (a virtual switch) as an example.
Conditions
To use SDN, you need a partner panel or access to it. SDN is not available at my.gridscale.io. If you do not have a partner panel yet, you can get more information here.
Furthermore, you need a firewall. In our example we use an OPNsense running on gridscale.io.
Note: We do not currently offer inter-dc-connection, which means that projects can only be connected within a site.
Instruction
Step 1
For our example, we will create a new account (formerly called “client”) in the Partner Panel, which you will give any name.
Then we switch to the account view (e.g. using the Jump In button). We create two projects: “Firewall” and “Front-end” (the names are up to you, of course). Note that for both projects you select the location where your private network will be located.
Now, as an example, we create an OPNsense in the “Firewall” project and any server (in our case a CentOS) in the “Front-end” project.
Step 2
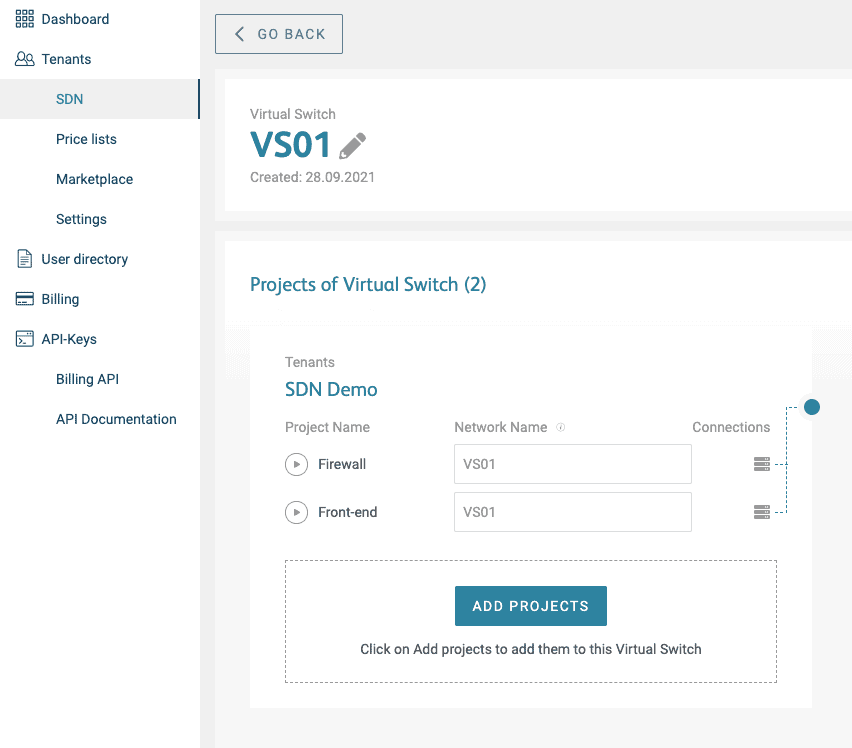
Next, we switch back to the Partner Panel and create a new Virtual Switch (e.g. “VS01”) under the menu item “SDN” at the location where we previously created the projects. We link the projects to the virtual switch (in which order does not matter).
Step 3
Now we switch back to the account. By linking the virtual switch to the projects, a new network card appears in the corresponding projects. We can now connect these to the servers from “Step 1” respectively, the OPNsense and the CentOS.

Step 4
For the next step, configure your firewall so that you can access the web interface. As mentioned, we use an OPNsense for this tutorial. You can find the ISO under the Public ISOs on my.gridscale.io.
If you need help installing a firewall, you can find a similar tutorial for installing a pfSense here.
Step 5
Once the firewall is installed, we can configure a DHCP server on the interface to which the “VS01” is assigned. In our example, the virtual switch is on the first interface of the firewall and WAN on the second.

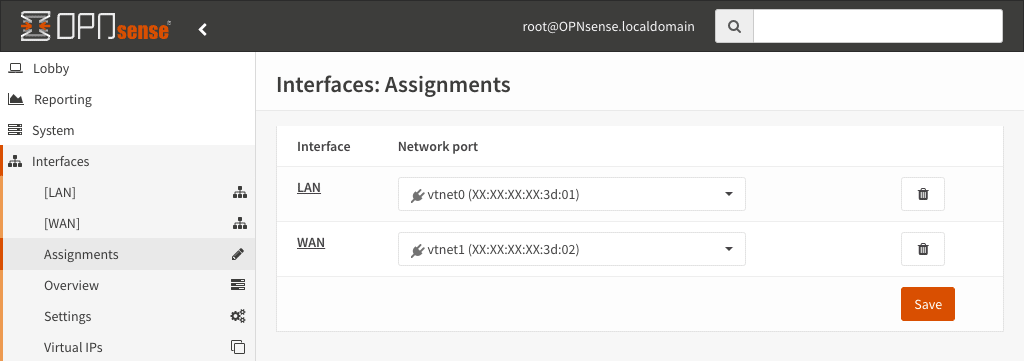
In the web interface of the firewall you can see that the default interface LAN is assigned to the MAC address of the VS01.
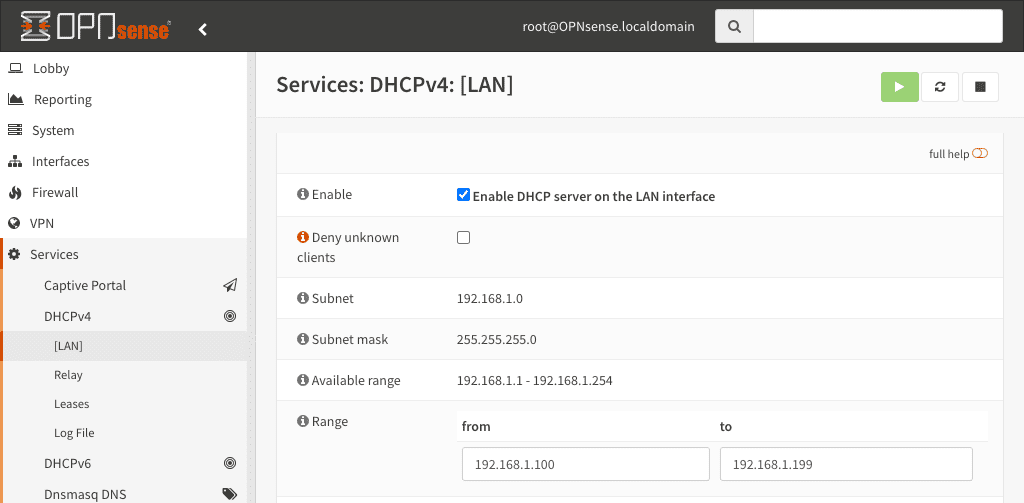
Example configuration of a DHCP server
Step 6
To check if everything is configured correctly, we now start the server connected to the VS01 in the “Front-end” project. If we now open the VNC, the server should have been assigned an IP address from the DHCP pool.
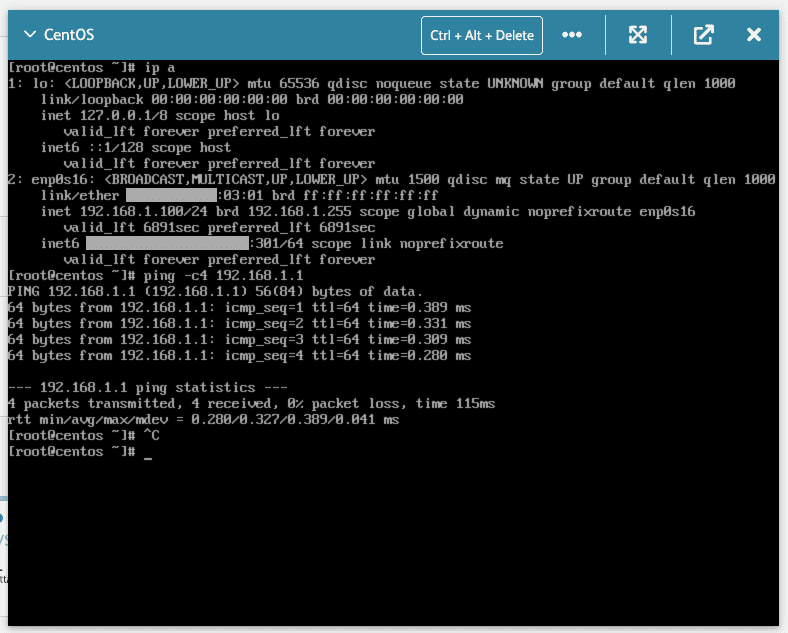
Additionally you could check if you can reach the gateway – you can check your default gateway on the command line with “ip r”..

Congratulations! You have connected two projects via SDN. You can now add more servers to this network.
Connect projects across accounts
Now you have learned how to connect projects within an account (formerly “client”). However, you can also connect projects across accounts by simply adding a project from another account to your Virtual Switch in the Partner Panel. Again, the project must be in the same location as the other projects and the Virtual Switch.
If you would next like to learn how to use breakouts to network multiple projects within an account or accounts with each other, then use the next part of this tutorial: How to SDN 2/2 (Breakout)
FYI: DHCP now also in our panels
For the example we have configured DHCP in OPNsense. However, since 06.11.2021 we also offer DHCP within our panels (more about this here).
Simply visit the “SDN” menu item in your partner panel and configure DHCP for your virtual switches.