How to gridFs
With our elastic file system gridFs, your data is wherever you need it. In our tutorial, we show you how to set up our high-performance and highly available file system in the way that suits you best. In no time you have a central data storage that keeps your most important files and documents always ready.
- Step by Step Guide
- 1. First create a gridFs
- 2. Create a new server and connect it to your PaaS service
- 3. Connect to the server via SSH
- 4. Install the NFS client on Ubuntu
- 5. Create a directory for your files
- 6. Mount your NFS with the following command
- 7. Create a new file, in the directory you created
- 8. Create a second server
- 9. Follow steps 3 to 6 for the second server
Step by Step Guide
Get your own file server in just a few clicks. In our step by step guide we show you how it works. Backup worries are a thing of the past!
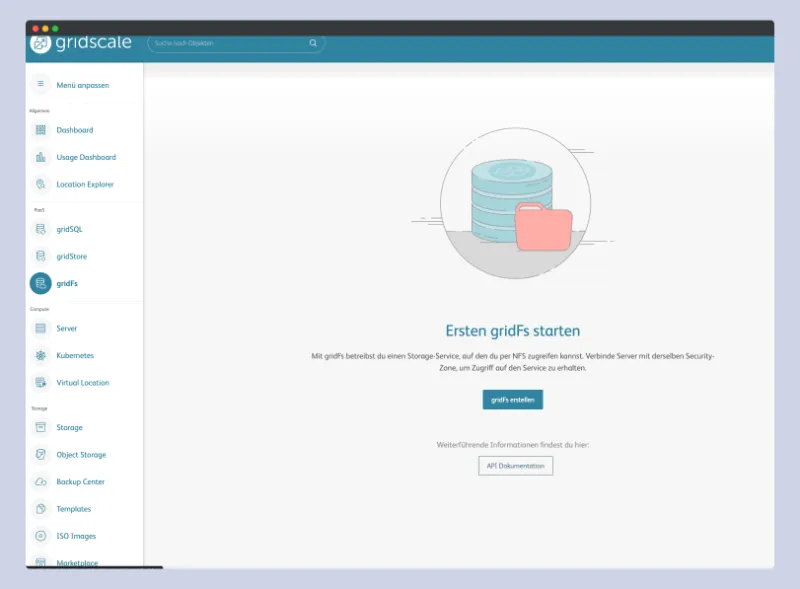
1. First create a gridFs
Navigate to the PaaS menu item and select gridFs.
Click on Create gridFs:
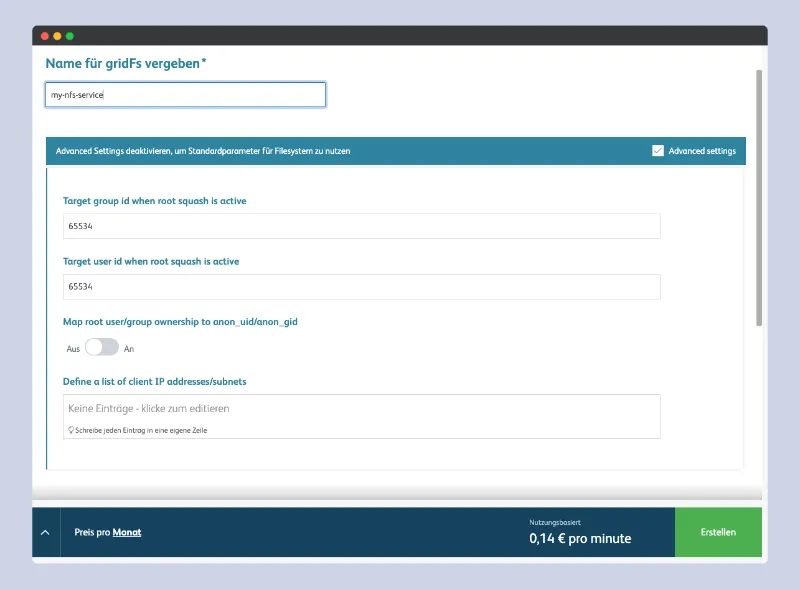
Create a new gridFs:
Bist du bereit zu starten?
Oder hast du noch Fragen? Lasse dir jetzt dein Konto erstellen oder dich in einem persönlichen Gespräch beraten.
2. Create a new server and connect it to your PaaS service
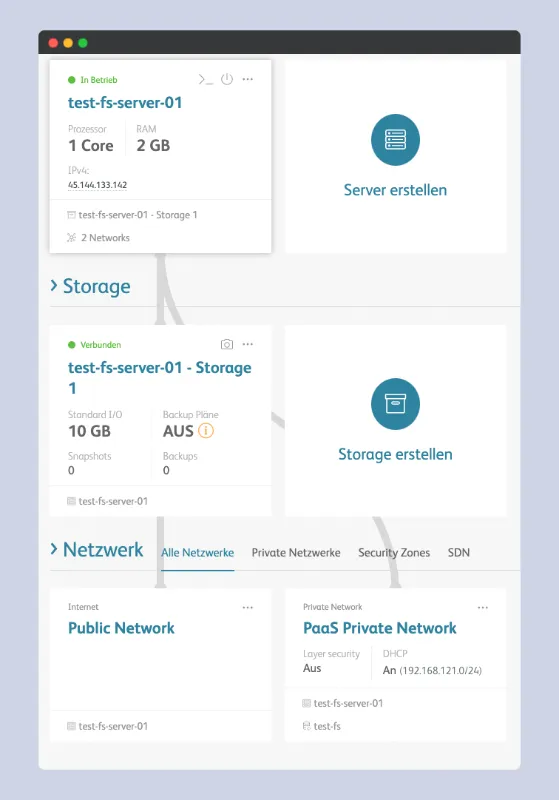
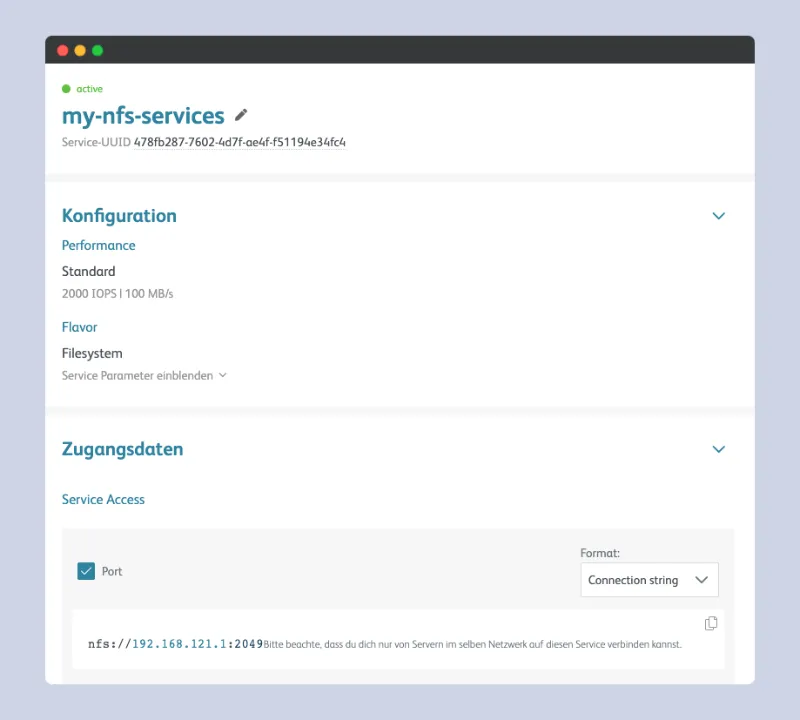
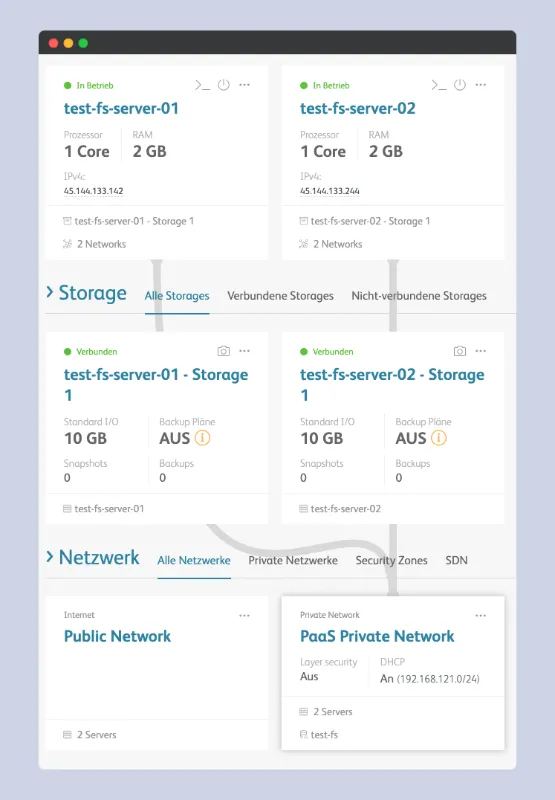
In this case, the NFS service has been automatically assigned an IP address via DHCP. You can find it here:
3. Connect to the server via SSH
ssh root@45.144.133.142apt updateapt upgrade4. Install the NFS client on Ubuntu
apt install nfs-common5. Create a directory for your files
In diesem Fall heißt das Verzeichnis nfsshare:
mkdir /var/nfsshare6. Mount your NFS with the following command
mount -t nfs 192.168.121.1: /var/nfsshare7. Create a new file, in the directory you created
touch /var/nfsshare/test-file-01 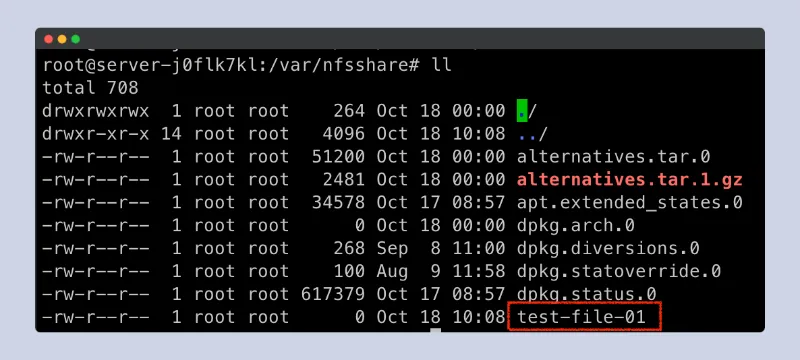
8. Create a second server
To verify that your NFS is working, create a second server and connect it to the PaaS service.
Important: Remember to connect your second server to the gridFS after creating it!
Your setup should then look like this:
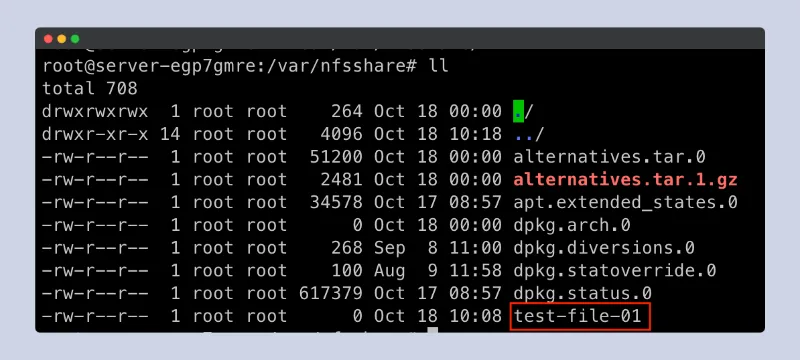
9. Follow steps 3 to 6 for the second server
After connecting to the second server via SSH, follow the same steps as the first time. If everything works, you should have access to the file you created from the other server as well.
Congratulations! You have created your first gridFs.