How to add SAML configuration with Azure
This tutorial will show you how to configure SAML with Azure AD for gridscale. This way you keep your administration effort low and end up with only one user management.
What is SAML?
SAML (Security Assertion Markup Language) is an open standard used primarily for exchanging authentication information. SAML increases the security standard in your company and simplifies the administration effort. With SAML SSO you can log in to different web applications with only one account. This saves time, is user-friendly, and, above all, is secure. Users only need to remember one set of credentials.
- What is SAML?
- Add SAML configuration to Azure AD
- Step-by-step guide
- 1. Log in to your Azure account
- 2. Click on Azure Active Directory
- 3. Click on Enterprise applications
- 4. Click on „New application“
- 5. Click on „Create your own application“
- 6. Create a new application with the following settings:
- 7. After your application has been created, click on it and choose “Single-sign-on”
- 8. Now you see the “SAML-based Sign-on” screen
- 9. Now enter the EntityID and the Reply URL.
- 10. Download the "Certificate (Base64)" file from the "3rd SAML Signing Certificate" and convert it to pem format
- 11. Now add the users who will later log in with SAML.
- 12. Log in to the Partner Panel
- 13. Navigate to the Branding module in the left menu bar of your Partner Panel and select the SAML tab.
- 14.Click the New SAML Provider button and enter your Entity ID and SSO URL.
- 15. Now upload the pem certificate
- 16. After you have saved your settings in the Partner Panel, you will receive the required "Entity ID" and "Reply URL".
- 17. Now create a new certificate in Azure
- 18. Download the certificate and convert it to pem format.
Add SAML configuration to Azure AD
If you want to log in to your gridscale cloud or partner panel, you can also do this using SAML. This step-by-step guide shows you how to add a SAML configuration to Azure AD.
Step-by-step guide
1. Log in to your Azure account
2. Click on Azure Active Directory

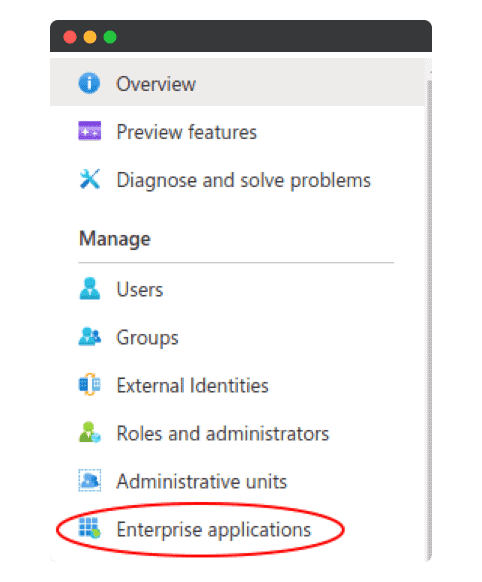
3. Click on Enterprise applications
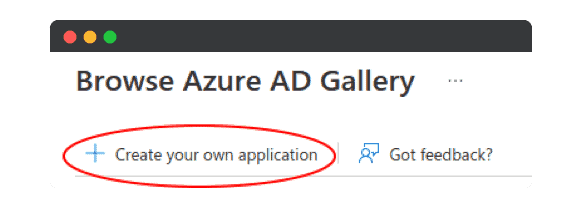
4. Click on „New application“

5. Click on „Create your own application“
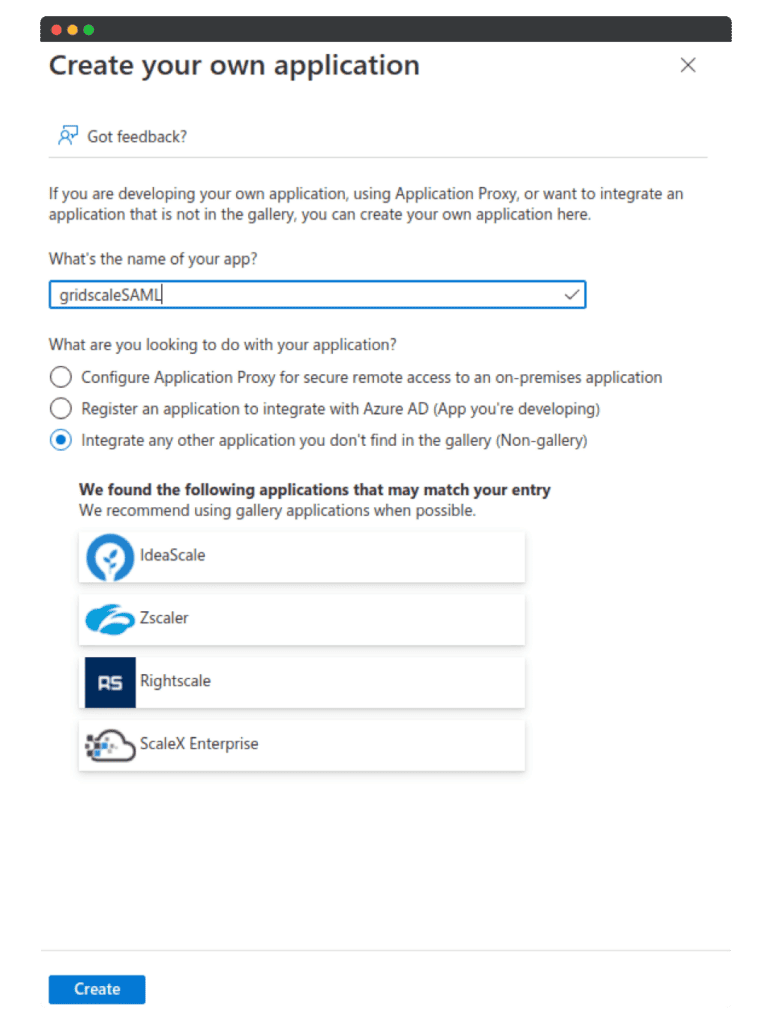
6. Create a new application with the following settings:
7. After your application has been created, click on it and choose “Single-sign-on”
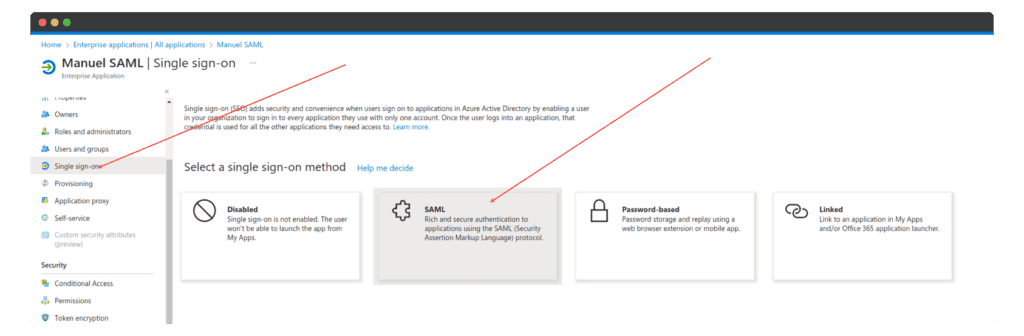
8. Now you see the “SAML-based Sign-on” screen
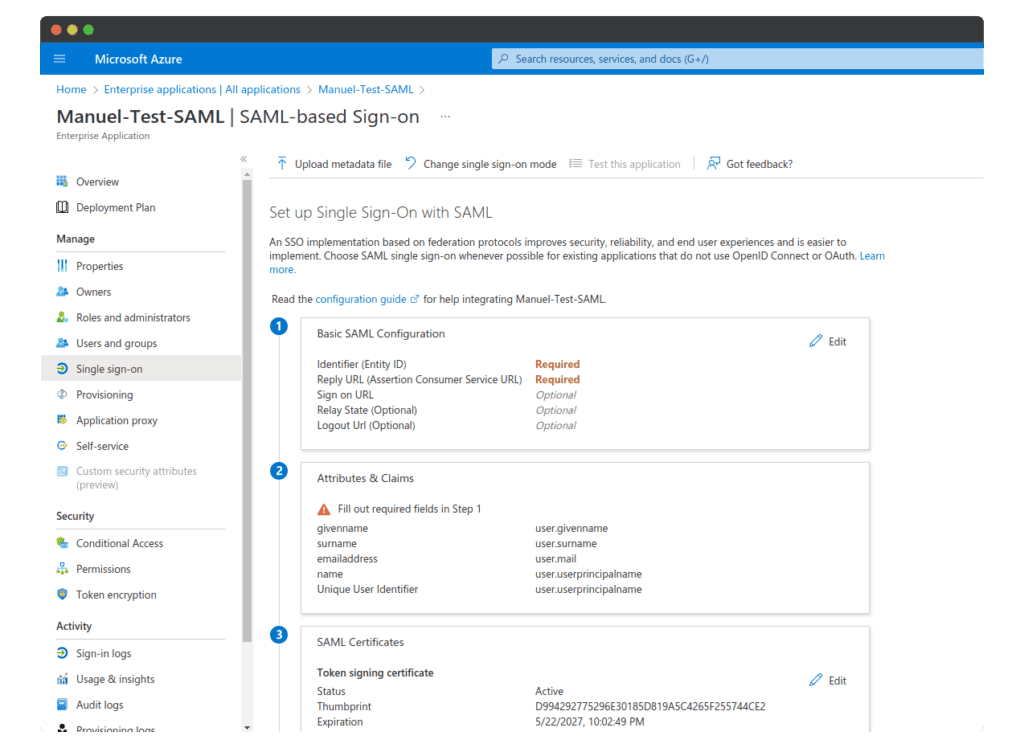
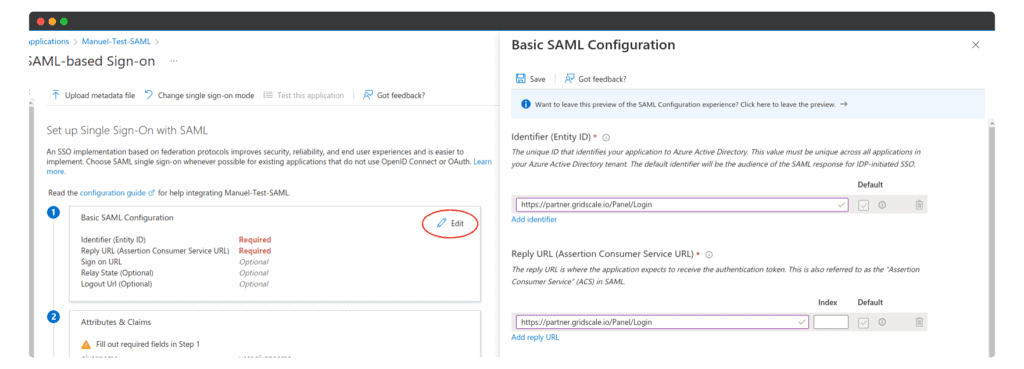
9. Now enter the EntityID and the Reply URL.
At first, enter only the values that work. We will edit this in a later step, for example: https://yourdomain.gridscale.cloud/Access
10. Download the “Certificate (Base64)” file from the “3rd SAML Signing Certificate” and convert it to pem format
You can easily convert the file to the pem format using OpenSSL: OpenSSL x509 -in cert.cer -outform pem -out cert.pem
openssl x509 -in cert.cer -outform pem -out cert.pem
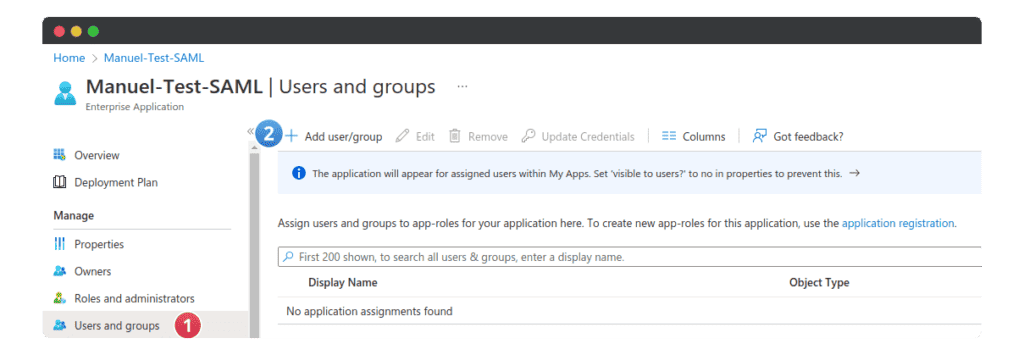
11. Now add the users who will later log in with SAML.
Ensure the users are registered in the gridscale Partner Panel with the same email address as in Azure AD.
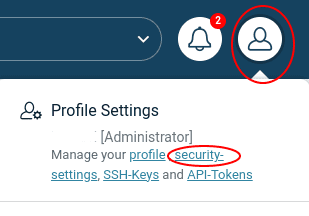
12. Log in to the Partner Panel
Important note:
- For SAML Login to work, the user must first be created in the Partner Panel.
- The user must be created with the same e-mail address as can be found in the Azure user directory.
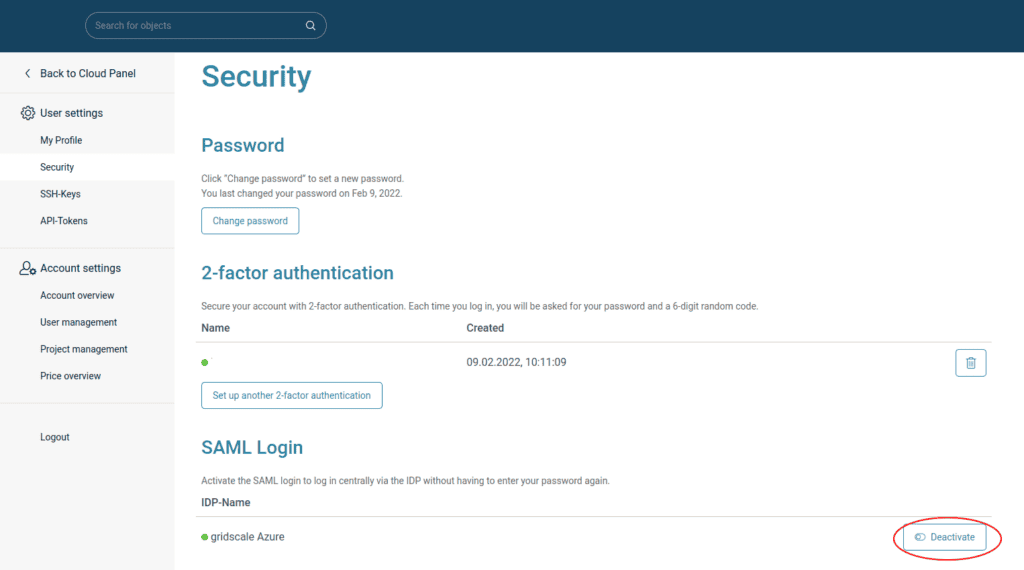
- The user must be assigned to an account, as SAML must be activated in the account’s security settings.
- SAML can only be activated in the account settings for the user, not in the Partner Panel.
13. Navigate to the Branding module in the left menu bar of your Partner Panel and select the SAML tab.
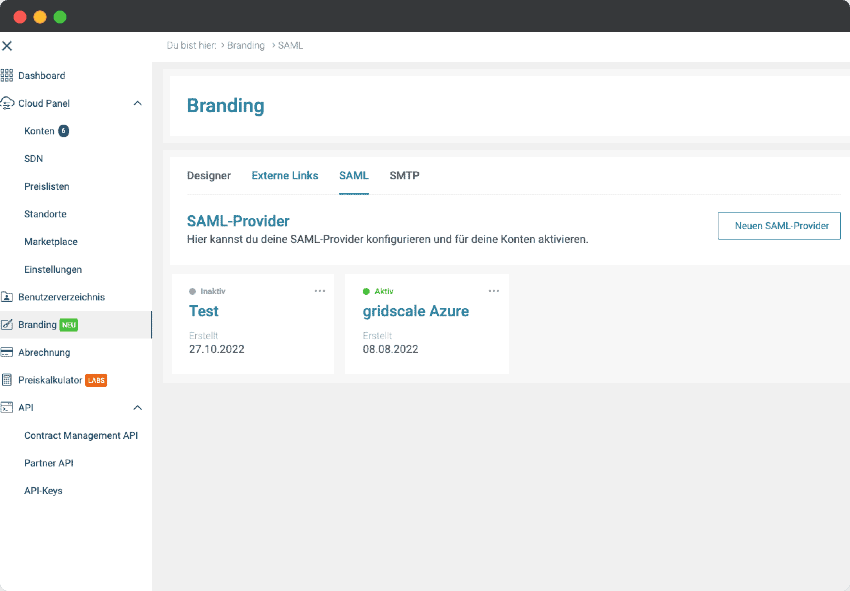
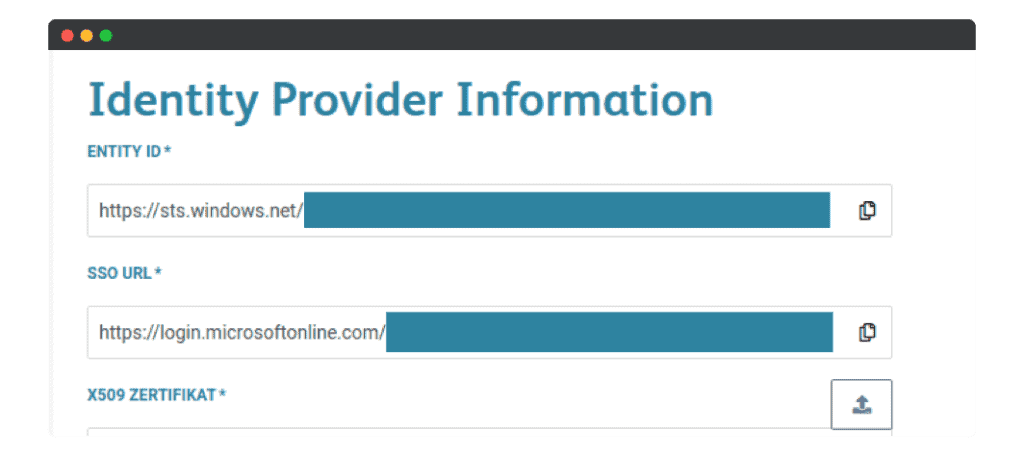
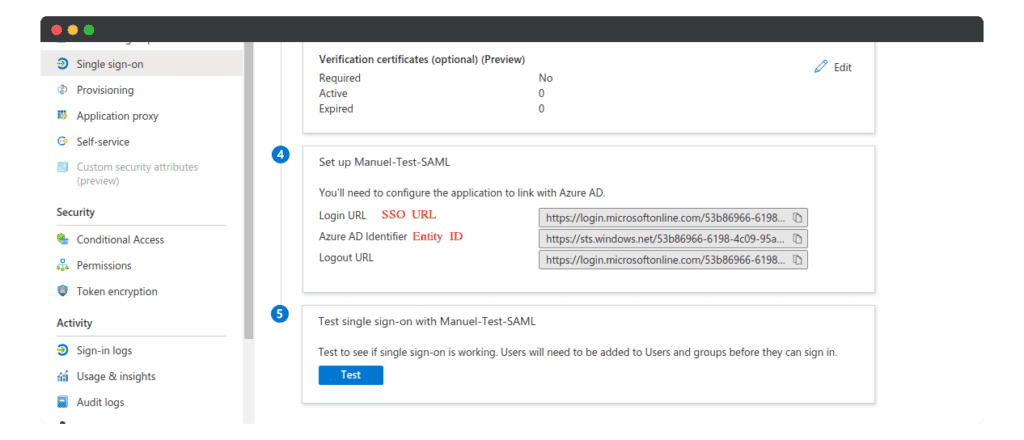
14.Click the New SAML Provider button and enter your Entity ID and SSO URL.
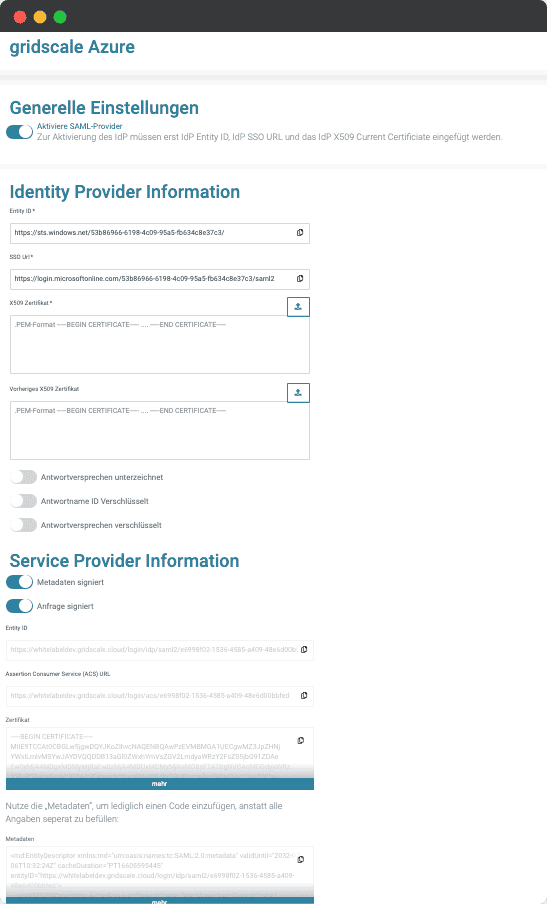
You can find these values in your Azure application.
15. Now upload the pem certificate
If you are unsure how to do this, go to step 10.

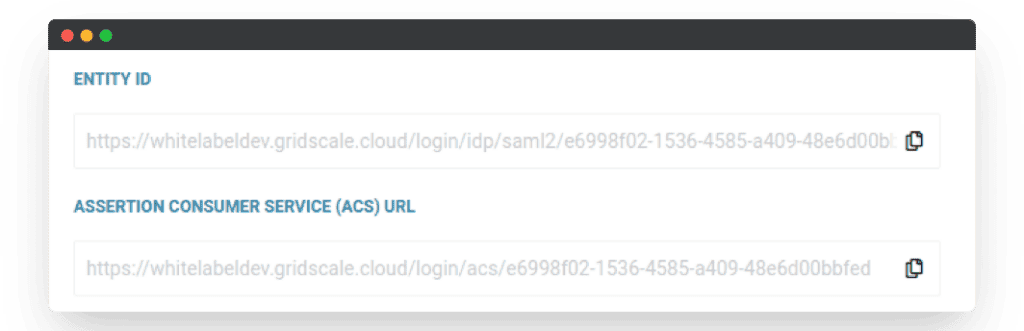
16. After you have saved your settings in the Partner Panel, you will receive the required “Entity ID” and “Reply URL”.
With these values, you can now edit your “Base SAML Configuration” in Azure (see step 9).
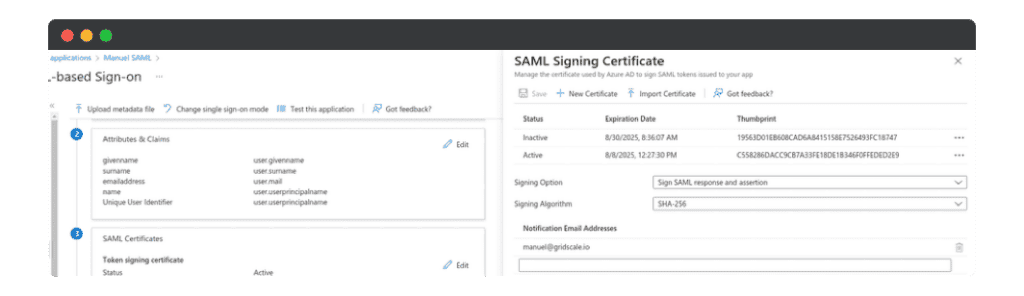
17. Now create a new certificate in Azure
Make sure you use the option “Sign SAML Response and assertion”. Otherwise, the login to the gridscale website will not work.
18. Download the certificate and convert it to pem format.
Then upload it back to the Partner Panel (see steps 10 and 15).
Congratulations! You have successfully configured SAML with Azure AD for gridscale.